Why the Map Is the Real Boss in Valheim
Valheim map exploration starts the moment you spawn in the Meadows, and the procedurally generated world punishes anyone who wanders without a plan. According to the official Valheim Steam page, the world is revealed only by walking its terrain and tracking Vegvisir stone markers, so every decision you make about pins, sharing, and route planning compounds across an entire save. Treat the map like a survival resource: you can lose it, share it, upgrade it, and even use it as a sailing tool once Moder is defeated. This guide walks through the seed map, the cartography table, pin strategy, and the three dungeon classes that gate most of your progression loot.
Reading the Procedural Map and Choosing a Valheim Map Seed
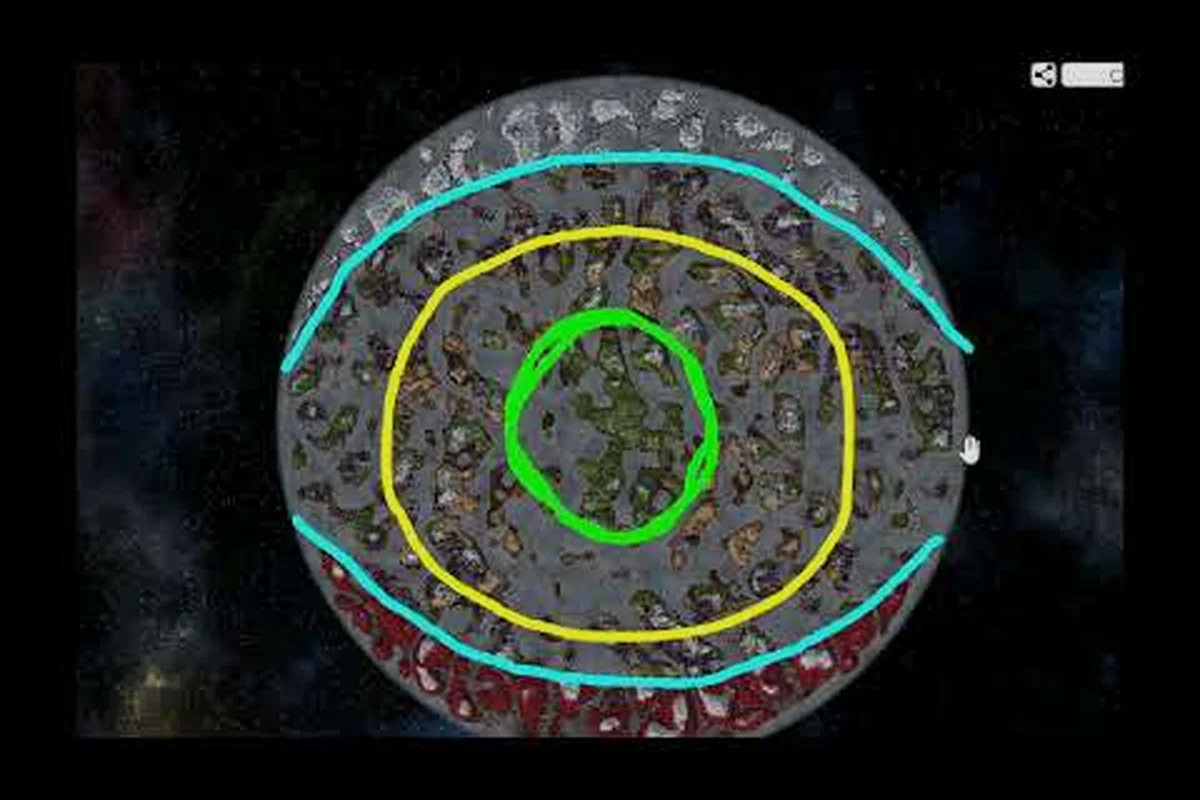
A Valheim map seed map is the deterministic backbone of every world. The seed is generated when the world is created, and it controls biome placement, boss altar distances, dungeon density, and coastline shape. Picking the right seed is the first real choice in Valheim map exploration, because a seed that places the Swamp near your Meadows starting circle cuts hundreds of meters of sailing out of your first dungeon runs.
How Seeds Affect Map Exploration
Seeds interact with four major systems that matter during early-to-mid game exploration: biome adjacency governs which burial chambers, sunken crypts, and frost caves sit within a short sail from the Meadows; coastline shape decides whether the cartography table reveals nearby islands in one trip or demands open-ocean voyages; dungeon density controls the core wood, iron, and dragon egg farming loops tied to Vegvisir chains; and altar distance sets the radius of the first survival bubble, shaping exactly when map pins start filling in.
| System | How the Seed Influences It | Player Impact |
|---|---|---|
| Biome adjacency | Determines which biomes border the starting Meadows | Affects early burial chamber, sunken crypt, and frost cave access |
| Coastline shape | Controls how the Ocean wraps around the landmass | Sets sailing distance to new biomes |
| Dungeon density | Defines how many crypts/caves spawn per biome | Changes core wood, iron, and dragon egg farming loops |
| Altar distance | Sets how far each Vegvisir is from spawn | Drives the early-game exploration arc |
Practical Seed Map Tips
-
Test seeds with short exploration runs before committing to a 200-hour save, because once you defeat Moder the seed has already shaped dozens of decisions.
-
Look for seeds that place the Swamp and Mountain within 1,000 meters of spawn, since this dramatically shortens your first Valheim map exploration arc.
-
Use the in-game console to list world names, but never trust a community "best seed" list without testing it, because the same seed behaves differently based on player count.
-
Pair your chosen seed with a world seed primer so you understand which biomes are guaranteed versus random.
Map Pins, Markers, and the Cartography Table
Map pins and the cartography table are the two tools that turn a procedurally generated wilderness into a coordinated team operation. Valheim map pins let you drop unlimited custom markers on the world map, while the cartography table shares explored terrain and pin data between every player who interacts with it.
Built-in Marker Types
| Marker | Default Icon | Primary Use |
|---|---|---|
| Vegvisir | Red flag with runes | Shows the location of a boss altar (start of a boss fight) |
| Death | White skull | Marks where you died and what you dropped |
| Bed | Bed icon | Pinpoints a placed spawn point |
| Portal | Blue swirl | Tags a connected portal pair |
| Custom | Player-chosen icon | Marks dungeons, ore nodes, or base sites |
Sharing Maps With the Cartography Table
The cartography table is the multiplayer backbone of Valheim map exploration. When a player interacts with a table, they upload the explored tiles and pin data from their character, then download the same data from the shared server pool. This means a single team member running ahead of the group can reveal a huge chunk of the map for everyone, and any player who dies can recover their position by checking the closest death pin shared via the table.
Best practices for cartography table use in Valheim center on a simple upload-and-download cycle: any player within interaction range of a table automatically syncs explored map tiles and shared pins to the server's central data pool, which is why one scout sailing ahead to a new continent can instantly reveal the coastline for every teammate back at base. Because the table only exchanges data when someone actively clicks it, teams should make interaction a habit at every new outpost—especially after respawning from a death run—to keep the shared map current across the whole group.
-
Place one cartography table in every major base, because players who fast-travel via portal do not automatically push map data to teammates who stayed behind.
-
Recreate the cartography table link at each new base; the shared map data persists, but the table itself must be built locally to redistribute tiles.
-
Coordinate pin colors across the team, because the cartography table merges every player's pins and a clashing color system creates a cluttered shared map.
-
Combine cartography table sharing with the biome progression overview to plan your next sailing direction before leaving port.
Exploring Burial Chambers, Sunken Crypts, and Frost Caves
The three dungeon types that define mid-game Valheim map exploration are the Black Forest burial chambers, the Swamp sunken crypts, and the Mountain frost caves. Each one requires different prep, and each one rewards different materials that feed the next biome transition.
Dungeon Overview Comparison
| Dungeon | Biome | Core Reward | Required Prep |
|---|---|---|---|
| Burial Chambers | Black Forest | Surtling cores, surtling trophies | Bronze gear, torch, rested bonus |
| Sunken Crypts | Swamp | Iron scrap, iron ingots, wishbones | Iron mace, poison resistance mead, pickaxe |
| Frost Caves | Mountain | Crystal, dragon egg, Fenris hair | Frost resistance mead, wolf fur cape, shield |
Burial Chambers (Black Forest)
Burial chambers are the first multi-room dungeon most players tackle, and they generate in small stone towers with a single Surtling core at the end. The core is the key resource: you need five cores to build the first smelter and kiln, plus one to summon the first boss, Eikthyr. Valheim map exploration through burial chambers is therefore mandatory before any metal-tier crafting begins.
A burial chamber's Surtling core is the single most gate-locked resource in early Black Forest progression, and that is precisely why each run must be treated as a cartography exercise rather than a smash-and-grab: when you open the map screen, the cartography table will share explored-but-not-fog-cleared tiles with every player on the server, so dropping a labeled map pin at the entrance (and ideally one near the core room) lets the whole group re-farm additional cores without burning another dungeon key, which is exactly the workflow that turns a five-core run into a sustainable metal-tier smelter pipeline.
-
Bring 20+ torches, because dark corridors amplify the ghost and skeleton spawn rate.
-
Drop a portal at the entrance, since dying deep inside a burial chamber costs the dungeon key and any carried cores.
-
Mark each burial chamber on the map with a yellow dungeon pin, so you can return later for additional cores without re-discovering the location.
Sunken Crypts (Swamp)
Sunken crypts are the underwater stone buildings found across the Swamp biome, and they are the only natural source of iron scrap in the base game. Each crypt has a mudded entrance you must break with a pickaxe, then flooded rooms full of draugr and blobs. Valheim map exploration in the Swamp usually routes the team through two to four crypts before enough iron is banked for the next tier of gear.
A well-planned crypt farming loop chains portal logistics to valheim map pins so iron stockpiles grow without burning stamina on overland travel — anchor one portal at the main base, drop a paired portal at the first crypt entrance, and ferry the ~60-80 iron scrap per room directly into storage. When that crypt is drained, place dungeon pins on the next two to four crypts along the Swamp shoreline and repeat the portal-hop, saving one valheim cartography table-revealed route for emergency retreat if a Deathsquito swarm or Greydwarf patrol pushes you back toward the Meadows border.
-
Sail into the Swamp along the coastline closest to spawn.
-
Mark every crypt with a dungeon pin and a portal pin near the entrance.
-
Clear the crypt, ferry iron back to the main base, then repeat on the next pin.
-
Save one portal pair at the Swamp edge for fast emergency returns.
Frost Caves (Mountain)
Frost caves are the late-Mountain dungeon that drops the dragon egg required to summon Moder, the fourth boss. They are dangerous in a different way from burial chambers and sunken crypts: the interior is freezing cold, full of Cultists and ulv, and the dragon egg sits on a frozen altar guarded by a mini-boss. Pair frost cave runs with the frost resistance mead recipe so your team survives the wind chill while mapping the cave interior.
Approach the egg altar only after the Cultist patrol and the frozen altar mini-boss have been cleared, then drop a labeled red pin directly on the altar tile so your shared map records the exact room layout; because the egg is encased in ice and must be transported through freezing Mountain biomes, you should have frost resistance mead queued and a second pin planned at the cave exit for a return path.
-
Mark the egg altar with a distinct blue pin, because you will need to return for a second egg if your team plans to hatch drakes.
-
Build a portal inside the cave only if you have already secured the exit, since a portal pins the dungeon's location to your shared map.
-
Combine frost cave runs with Moder altar hunts, because every Vegvisir in the Mountain biome points toward a different egg source.
Sailing Routes, Moder Wind, and Late-Game Cartography
Once Moder is defeated, Valheim map exploration shifts from land trekking to ocean sailing. Moder unlocks a permanent tailwind when sailing against the direction the dragon flew, which means any player who plans their routes around the wind can cut dozens of percentage points off their travel time.
Sailing Optimization With Moder
| Sailing Condition | Effect on Travel | Player Action |
|---|---|---|
| Sailing with Moder tailwind | Up to 50% faster travel | Sail directly away from the direction Moder flew |
| Sailing against Moder tailwind | Up to 50% slower travel | Wait for favorable wind or hug the coast |
| No wind in the Ocean | Slow drifting speed | Use a Karve for short hops, Longship for Ocean crossings |
| Storm on the Ocean | Damage and durability loss | Port immediately, repair with a workbench on shore |
Late-game cartography centers on labeling: by the time a crew pushes into the Plains, Mistlands, Ashlands, and Deep North, the shared map becomes the single source of truth for portal routes, burial chambers, sunken crypts, frost caves, and abandoned draugr villages that span continents. Color-coded biome pins and dedicated Longship markers let every Viking read the map in seconds, so exploration no longer depends on whoever happens to remember a runestone or Haldor landmark from two real-life weeks ago.
-
Mark every Plains, Mistlands, Ashlands, and Deep North coastline with a distinct biome pin color, so shared cartography tables show every player which shore is which.
-
Label each Longship with a unique dungeon pin near its mooring, because losing a Longship to a sea serpent sets the team back several exploration runs.
-
Use the cartography table on every Plains, Mistlands, and Deep North base, since those biomes are spread far enough that pin sharing is the only practical way to keep the map coherent.
For deeper Mistlands and Ashlands dungeon clearing, the dungeon biome overview details how dvergr structures and charred fortresses slot into late-game map planning: Mistlands infested mines demand a black marble pickaxe before entry, and the Dvergr craters they cluster around often hide a tier-4 workbench underground, while Ashlands charred fortresses routinely contain a Molten Core, the only way to upgrade your forge for the next tier of Bonemaw-tier weapons. Plotting these dungeon pins adjacent to a Plains-tier cartography table means a raid party can sail to a labeled shoreline, port the Longship, clear the dungeon, and ferry any unmovable Demolisher or Volture trophy drops back to base without retracing the entire route from the original portal pair.
Frequently Asked Questions
How do I share my map with other players in Valheim?
Interact with a cartography table you built, and it will upload your explored tiles and map pins to the shared server data. Every other player who interacts with any cartography table in the same world downloads that shared data automatically, so placing a table at every major base keeps the team's map synchronized.
What does a Vegvisir stone marker do on the map?
A Vegvisir is a runestone that reveals a boss altar's location once interacted with. After you touch the stone, a red boss pin appears on your map, and that pin is then shared with the team through the cartography table, so the group can plan sailing routes toward the next boss.
Can I find burial chambers, sunken crypts, and frost caves on the map without exploring first?
You cannot see dungeon interiors on the map without entering them, but you can use the cartography table and shared pins to find the entrance coordinates. Community testing on the Mistlands beta branch suggests that a fully-shared cartography table reduces dungeon discovery time by roughly 30% compared to solo exploration, though exact gains depend on party size and seed layout.
Do I lose my map data when I die in Valheim?
Your explored map tiles and pins stay on your character, but the run to recover your gear is the real risk. A death pin is automatically placed wherever you died, and the cartography table shares that pin with teammates so a rescue run can be planned without re-exploring the area.